
Despite wearing all my warm clothes and having my sleeping bag tightly wrapped around me, I was still cold.
The wind chill on the top of Mt Fuji was intense and I was shivering, shuffling my feet trying to get a little bit warmer, pacing up and down a small section of path that wasn’t filled with people, and impatiently waiting for the sun to come over the horizon.
Finally the orange glow of the sun started to reveal itself over the horizon – but I was too cold to get my gloved hands out from beneath the sleeping bag and grab my camera out of my backpack.
Reasoning that I wasn’t going to do this hike again, I eventually managed to coax out my hands, grab my camera, and subsequently tried not to shiver while taking a photo.

If you’ve made it this far – you’re probably wanting to find out what it’s like to hike to the top of Mt Fuji – and how you can do it without a guide. Lucky for you, you’ve come to the right place.
One Saturday in July – my backpack loaded with warm clothing, four litres of water, a sandwich, snacks and a headlamp, I set off to hike Japan’s highest mountain.
Here’s what it was like to hike up Mt Fuji – as well as some useful tips on how to do it.
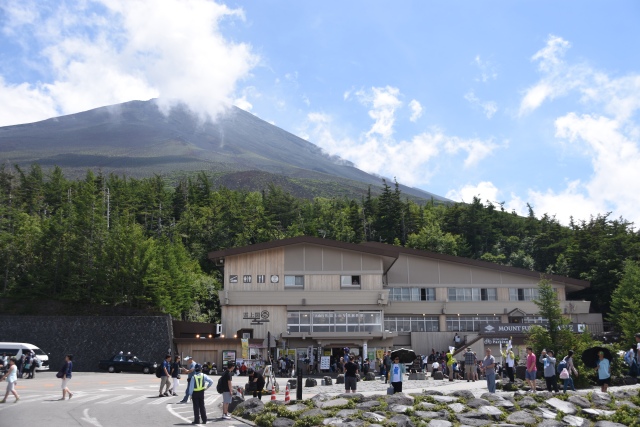 View of Mt Fuji from 5th Station
The Lowdown
Hopping off the bus from Tokyo at Mt Fuji’s 5th Station, the 3,376 metre mountain loomed above me – periodically covered in a thick swirling cloud.
I wasn’t the only one up there. Swarms of people crowded across the station, which is filled with cafes and shops. Some people come up here just to see Mt Fuji, while others plan to hike to the top.
I arrived at 5th Station just after 12pm. This station lies at 2,305 metres above sea level, and I was planning to stay at that altitude for a couple of hours to acclimatise a little. After all I was in no rush – I had all night to climb this mountain.
After getting my Mt Fuji map, which detailed the location and altitude of all the mountain huts, and then realising the ice creams were out of my budget, I started to make my way over to the Yoshida Trailhead and started the ascent just before 2pm.
Once you leave 5th Station, you walk along a flat trail for about a kilometre and then you see a sign to your right saying Mt Fuji Summit. The trail is clearly marked the whole way and it’s easy to follow due to the crowds of people ascending it every day during the brief hiking season.
Slow and steady wins the race, and I started by meandering along, passing many people coming down who looked absolutely shattered. What was I getting myself into, I thought to myself. But this is the main thing I came to Japan to do so of course I continued on.
Less than an hour after I left 5th Station, I reached 6th Station.
From 6th Station, you start going up switchbacks. It’s a steady trudge as you wind up the mountainside, and because Mt Fuji is a volcano it’s pretty desolate at this point and there’s not much to look at. So I remained lost in my thoughts and just kept heading steadily up – one step after the other.
Once I reached one of the mountain huts around the 7th Station mark, I took a seat on one of the outside benches, had a chat to some other hikers and chowed down on some rice.
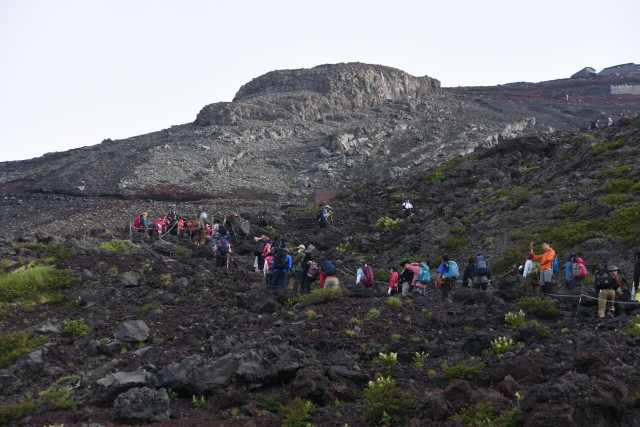
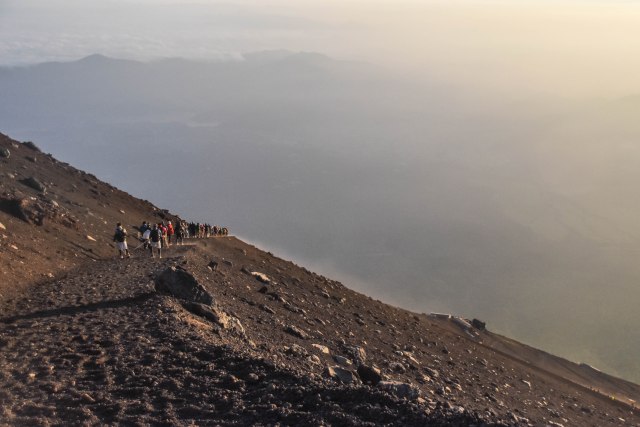
After 7th Station, Mt Fuji starts getting steeper and the gravelly volcanic rocks are very slippery, so progress is slow. Then you start walking up jagged rock sections rather than a well worn trail. I didn’t find this difficult as I’m used to this sort of terrain, but others did and it caused huge traffic jams. I tried to wait it out when there was lots of congestion on the trail as I wasn’t in any hurry.
 Traffic jam Mt Fuji style
But a couple of times I got stuck in the crowds and was inching up with no way to pass.
The rocky terrain continues in patches from 7th Station as you continue to ascend. From here on up, there’s also lots of mountain huts and it seemed you reached one about every 10 minutes or so. You can sleep in these mountain huts, as well as buy food and drinks. All the mountain huts have toilets too and work on an honesty system. The asking price is 200 Yen.
 Outside one of the mountain huts near 8th Station
By the time I reached 8th Station, most people were calling it a day and were going to get a few hours of sleep in one of the mountain huts before making the final push to the summit. I enquired about the price and was told it was 9800 Yen. I didn’t want to pay that price for maybe a few hours sleep so it was settled that I was going to wait on the summit for sunrise as per my original plan.
 Inside one of the mountain huts. The beds are behind the curtains.
Once past 8th Station, I continued on by myself – very slowly. I knew that it would be freezing at the summit so wanted to keep moving as long as possible. I was just above 8th Station when the sun set and I hung around for about 30 minutes taking photos.
 Sunset from above 8th Station
Back on the trail, I eventually caught up to two guys from Russia and Brazil who were also planning to wait for sunrise on the summit and started hiking up with them.
By the time we reached 9th Station (which I think once was a mountain hut but is now in disrepair), darkness had fallen and we were hiking up in the dark.
Progress was slow and steady in the dark as we negotiated more rocky sections that rose up steeply, guided by the light of a headlamp and phone.
The last 200 metre climb seemed to go on forever as it got colder, windier and steeper – and I needed to use my hands a couple of times to get up a rocky section.
Myself and my new hiking buddies reached the summit at about 10pm. We then clustered our sleeping bags together and huddled in the darkness near Mt Fuji’s yawning crater. There was only three other people up there. One was huddled in a sleeping bag on a bench, and two were sheltering in the bathroom facilities. It was a pleasant surprise to find out that the toilet seat was heated – my only precious moments of warmth that night.
It felt like a very long night. I was wearing every piece of clothing I had and was cocooned inside my sleeping bag. I was still freezing. I didn’t sleep a wink despite desperately trying and just waited for the hours to pass by.
Around 2.30am, those hikers that had stayed in the huts started to arrive at the summit. Sunrise was at 4.45am so there was still a few hours to go until I was going to be warm again.
At 3am, I unfurled myself from my sleeping bag and together with my new friends, we went off in search of a sunrise vantage point. We found a lookout slightly sheltered from the wind, and waited.

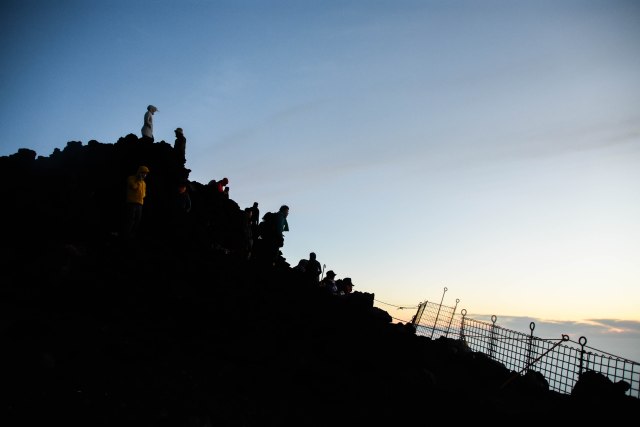
 Waiting for sunrise from the top of Mt Fuji.
It got colder as the sunrise approached and everyone looked pretty miserable. Then finally at 4.45am, the sun peeked over the horizon, lighting up the mountainside and the crater, and it started to get a little warmer.
By the time the sun came up, I was pretty ready to get off the mountain. The descent began about 15 minutes later after a few happy snaps. The way down is adjacent to the way you ascend – and basically it’s boring switchback after boring switchback down steep, slippery gravel like terrain with not a lot to look at. And it wasn’t so fun for the knees.


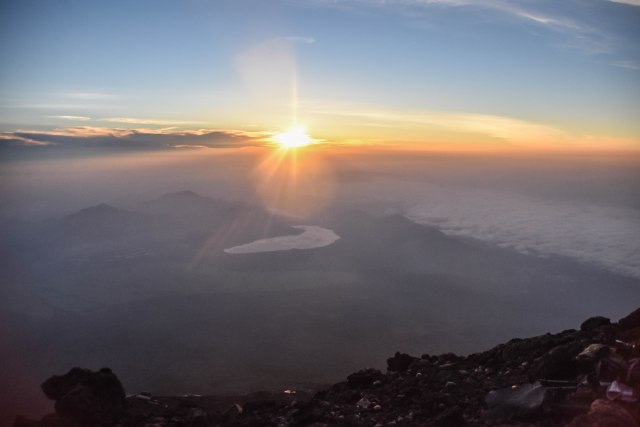 Sun’s up! Finally!
But at least it was a lot warmer and I shed layers down to my T-shirt about an hour after leaving the summit.
While it took eight hours to get up at a slow and steady pace with breaks – it took just 3.5 hours to get down. Luckily, a bus to Lake Kawaguchiko came by 20 minutes after I got off the mountain so I was on my way to a shower and a hot coffee in no time.

Know Before You Go
Now for the important information. Read on to find out when to go, how to get to Mt Fuji and a recommended equipment list.
The Facts
Mt Fuji Elevation: 3,776 metres above sea level
Starting Point: Yoshida Trailhead near 5th Station (This is the most popular route up the mountain)
Starting Point Elevation: 2,305 metres above sea level
Elevation Gain: 1,471 metres
Duration: The duration of this hike is dependent on how fast you want to reach the top. The average time up is about six hours, and the descent is four hours. It took me eight hours to reach the top as I took my time. The descent took me 3.5 hours.

 The descent.
When To Go
Mt Fuji’s hiking season starts on 1 July and runs until around late August-early September, depending on when the first snowfall hits. It’s possible to hike other times of the year but be prepared for snow and very cold conditions. The mountain huts are also not open outside of the official hiking season.
Plan to head there on a weekday as weekends are incredibly busy with many locals coming to climb the mountain along with tourists.
How to Get There
It’s easy to get to Mt Fuji from Tokyo and you can either go by bus or train.
The most direct way to get there is by bus from Tokyo’s Shinjuku Expressway Bus Terminal to Mt Fuji’s 5th Station. You can buy tickets at the Shinjuku Expressway Bus Terminal at the ticket machines or at the ticket office. You can also buy your ticket online. I recommend buying your ticket at least a day or two in advance. Online tickets only go on sale a month before your chosen date.
The bus takes about three hours to get to Mt Fuji from Tokyo.
You can also opt to take a Japan Rail (JR) train to Kawaguchiko Station from Shinjuku JR Train Station and then take a local bus up to the 5th Station.
I recommend taking a mid morning or early afternoon bus or train so you start hiking in the afternoon.
Equipment List
Mt Fuji should only be attempted by experienced hikes used to steep inclines, high altitude, rough terrain and cold temperatures.
What you’ll need on your hike depends on if you choose to stay at the mountain huts or not.
At a minimum, you will need:
- Warm jacket, wind proof jacket and mid layer fleece for sunrise.
- Head lamp.
- 3-4 litres of water. (Be warned you cannot refill bottles on Mt Fuji as it is all recycled water in the bathrooms. You can buy water but it can be up to 500 Yen for a small bottle.
- Beanie and gloves.
- Snacks such as chocolate bars, dried fruit and nuts, bread, juice and candy. (Snacks can also be bought on the mountain but it’s expensive.)
If you don’t plan on staying at one of the mountain huts, I recommend also bringing a warm sleeping bag (rated to at least 1-2 degrees Celsius and plenty of food.
People who stay in the huts are provided with blankets and meals.
If you’re prone to altitude sickness, consider taking some altitude sickness tablets before you head up.
Mountain Huts
The big question is will you stay at the mountain huts or not? Mountain huts are located at regular intervals along the Yoshida Trail from 7th Station upwards.
Your bed is simply a mattress with blankets bunched up next to a row of other beds(similar to a dormitory set up).
Prices for a bed start from around 7000 Yen. It’s gets more expensive the higher you go.
I opted not to stay in a mountain hut and I’m glad I didn’t. Every hiker I talked to who opted to stay in the huts said it was a waste of money as it was impossible to sleep with hikers coming in at all hours – so essentially you stay for warmth, a meal and a lie down. People who stay in the huts generally start the ascent up to the summit around 1am.
What time should you start the hike?
The time you should start the hike depends on if you want to do it as a day hike, if you’re staying in a mountain hut, and if you want to see the sunrise.
If you intend to stay overnight on Mt Fuji to wait for the sunrise (this is what most people do) then you’ll want to start in the afternoon.
If you’re staying in a mountain hut, plan to start around midday so you can make the most of your rest time when you reach your hut.
If you’re not staying in a mountain hut, I would start around 3-4pm. I started at 2pm but wish I had started a little later as I was much warmer while hiking and it was not too bad hiking at night by the light of a headlamp. And there was no one on the trail once the sun set.

What’s the terrain like?
Mt Fuji is an active stratovolcano (don’t worry too much as it last erupted in 1707), but this means the trail is steep with very loose, slippery rocks. Most of the way you traverse along switchbacks steadily heading up. Around 7th station is when you start clambering up more rocky terrain – but there are lots of places for your feet.
Going down was tougher than I expected – especially with the lack of sleep – but it was much quicker than the ascent. The route down is adjacent to the ascent route and is a series of monotonous switchbacks down a steep path filled with slippery gravel like volcanic rock. Take it slow to make sure you don’t slip on the rocks.
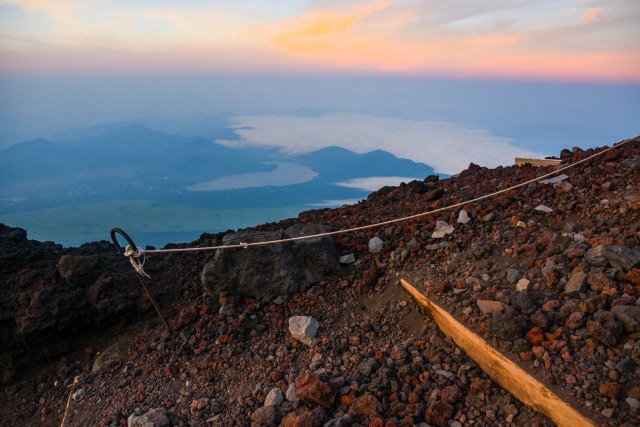
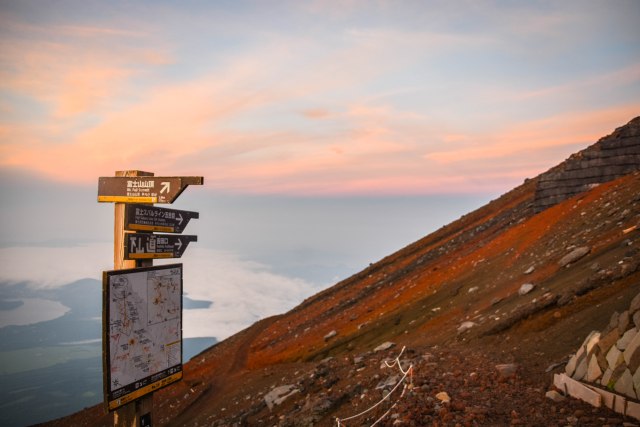
It’s very easy to follow the trail. Because the official hiking season runs for only about two months – it’s very busy during July and August so there will always be people on the trail.
There’s also lots of signage and barriers marking the trail so it’s easy to find the way up.

What’s sunrise like?
Sunrise was magical! Even though I was freezing at the top – it was beautiful seeing the sunrise, which lit up the volcano and its crater.
You can also do the 90 minute walk around the crater and see the shrines built on top of Mt Fuji.
The summit area is huge so while there is a lot of people it’s easy to find your own perch without looking at the back of someone’s head!
It can be very cold at the summit in the hours before sunrise so bring warm clothing or quickly make some friends to huddle with.
Things You Should Know
Here’s a quick summary of important information about the Mt Fuji hike.
- Toilets on the mountain cost 200 Yen.
- There’s no drinkable water on the mountain or at 5th Station to refill your water bottles. You can buy bottled water but it’s expensive. Bring at least 3L of water with you if you don’t want to pay.
- Mountain huts don’t need to be booked in advance for solo hikers. Even on an extremely busy day, there were vacancies at the mountain huts around 8th Station.
- If you don’t want to pay for a mountain hut, you can stay on the summit (tents are not allowed). There are benches that you can roll out a sleeping bag – but it better be a warm one as it’s very cold on the summit.