
Raging rivers, rain, wind and snow have shaped the American state of Utah into the unique landscapes of today – and now they are a playground for adventurers.
You can wade through rivers, gaze up in awe at towering rock walls, explore inside the depths of canyons and even find dinosaur footprints.
Check out my guide to the best hiking trails in west Utah.
The Narrows
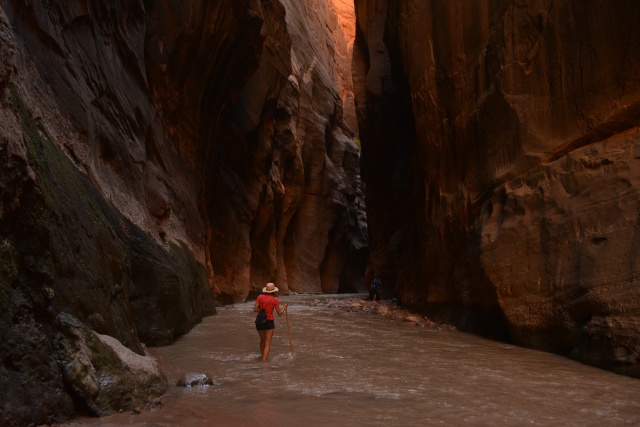
It’s one adventure after another in Zion National Park. The Zion Narrows trail was a hike like nothing I’ve ever done before – because you’re hiking in a river the whole time. The hike starts at the Temple of Sinawava – the last stop on the east side of the national park.
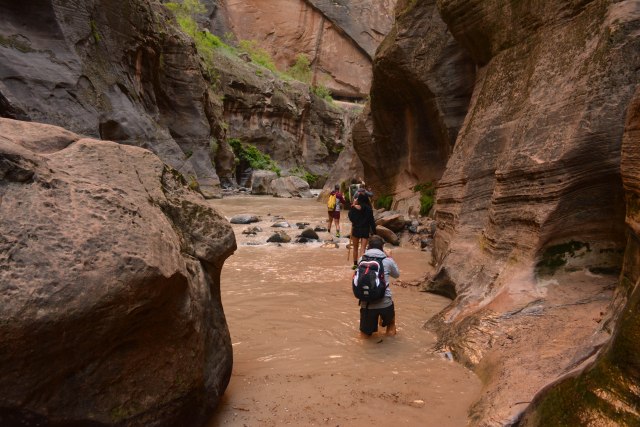
As soon as you hit the Virgin River, there’s no choice but to get your feet wet as you zig zag across the river to go forward.
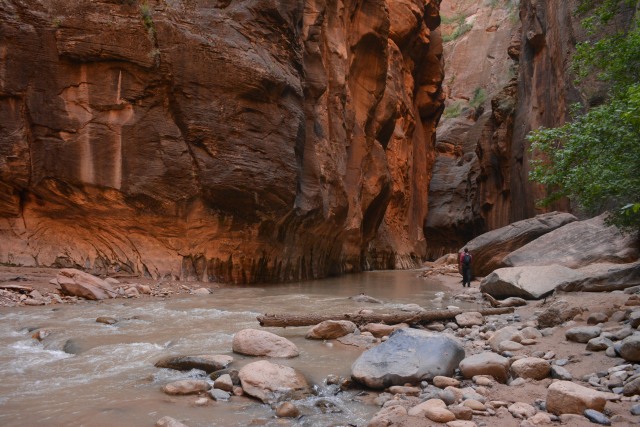
The Zion Narrows trail is open at first before the canyon narrows around you and becomes tunnels of rock walls blocking out the sun. It has to be seen to be believed.
The trail is challenging but I like to call it an adventure. You can’t lose focus because you need all your concentration so you don’t fall over while making the river crossings or rock hopping along the informal trail.
Going into the canyon is the hardest bit because you never know how deep the water will be. I’m a little on the short side at five foot two, but luckily the water never made it above my waist. I made it out with my bag (and camera) water free!
How long you continue along the trail is up to you. I continued along the trail for about 90 minutes but my friend continued on for another hour before turning back the way we came. Allow about four to eight hours for a return trip depending on your fitness levels and how far into the canyon you want to go. The complete Narrows trail is 15km return.
The return trip is a lot easier because you know what to expect and can ‘read’ the water on where it’s going to be deep and you’ve got your crossing water walk down pat. Some people took walking poles and wore shoes suitable for walking in water but we did fine in good quality trail shoes and without walking poles.
The Subway
The Zion Subway is another day hike full of adventure. This one you need to prepare for as there’s a daily limit to the number of people allowed on the trail each day so you need a permit. To obtain a permit, you have to enter the US National Park lottery system online three months before your planned trip by paying a small fee, picking three dates suitable for you to do the hike, and crossing your fingers that you make the cut. You can only enter once per month. I entered twice – once in August and once in September, and luckily got a place on one of my September dates and took three friends with me to the Subway.
This hike begins in the Kolob Canyons section of the park. There’s the option to enter the Subway from the top down or bottom up. The top down option is for experienced canyoneers, so we hiked from the bottom up from the Left Fork Trailhead.
I’ll admit we were a little nervous as we set out. This is an area shaped by flash floods. A park ranger had told us that there would be rain on the day of our hike and the flash flood risk was ‘possible’. As we stepped from the car, thunder rumbled around us and we felt drops of rain.
But undeterred, we pulled on our rainjackets and hit the trail. Luckily the rain didn’t last long.
The first section takes you through forest, before heading down a steep hill to a river. You then follow a rough trail along the river to the Subway. About three kilometres along the trail there’s two large slabs of light grey rock on the left on the river. Look closely and you’ll see dinosaur footprints!
The trail is about seven kilometres each way and it was hard going as the trail was not always clear but that was part of the adventure. We were crossing the river, climbing over rocks, and sliding along on mossy rocks as water cascaded down them – but always making sure we were following the river.
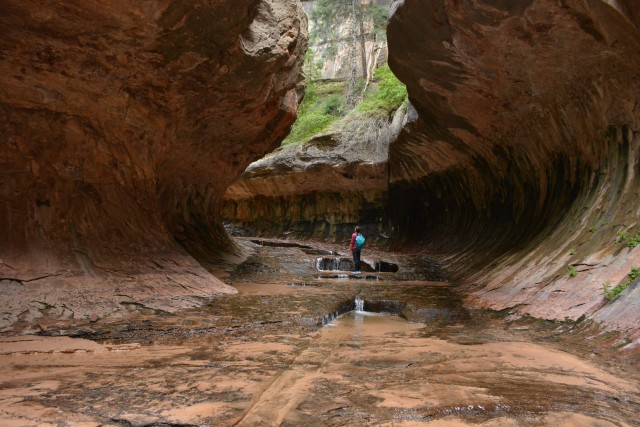
The end of the trail is when you reach the Subway – a spectacular curved rockface shaped by powerful flash floods.
As you enter the Subway, water pools around your feet and at the end of the trail you’re met by a waterfall. At this point, thunder rumbled around us again and it started raining a little – we were a little nervous but obviously made it out to tell the tale!
Angel’s Landing
You can also tackle the Angel’s Landing trail in Zion National Park. This is another hike you’ll need a permit to do, entering via the lottery system.
This 8.7km return hike takes you up a series of seriously steep switchbacks before levelling out but then it’s up again – ascending the rockface with the help of a chain! More torture for your legs! But the views across the park are all worth it – it has to be one of the best views in the park.

If these hikes don’t appeal to you, then there’s plenty of other shorter trails to enjoy in the park. The Visitor Centre offers a wealth of information to help you decide on what trail is best for you. But even the drive in alone is worth a visit to this park – especially through the Mt Carmel Tunnel that’s on the eastern entrance to the park.
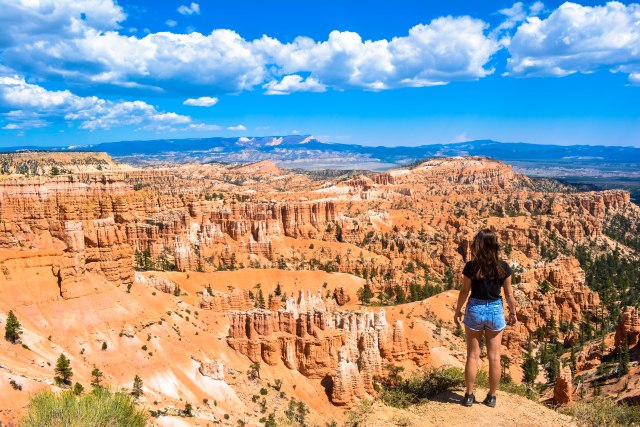
Bryce Canyon
About an hour’s drive from Zion National Park is the equally impressive Bryce Canyon – a bright orange landscape filled with tall, thin spires of rock called hoodoos.
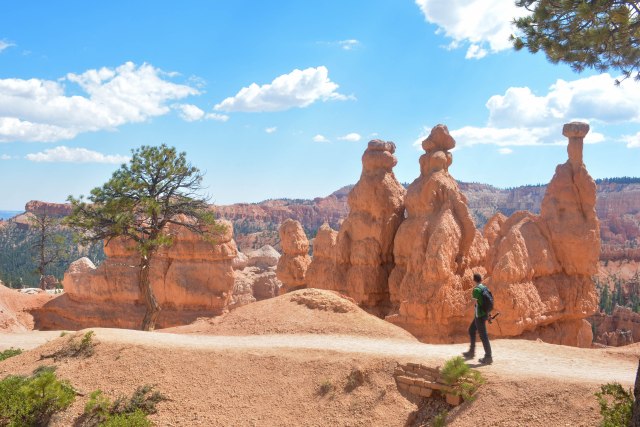
The best bang for buck way to see the park is via Queens Garden and Navajo Loop trails.
These trails link up and make a 5km loop into the canyon and past the hoodoo rocks. There are some steep sections – including a lot of switchbacks – but sweeping views. The most scenic way to do the hike is clockwise starting from Sunset Point and ending up at Sunrise Point.
If hiking’s not your thing, you can get good views only a few metres from your car at Sunset or Sunrise Points or at the various lookouts along the main canyon road.
Things You Should Know:
- You’ll need to drink plenty of water to keep hydrated in the Utah heat during summer. Water filling stations are available at many trailheads or at the visitor centres of the national parks. Also don’t forget to pack the sunscreen – you’ll need it!
- Each US National Park charges a fee to enter. Bryce Canyon and Zion National Park both charge $US35 per vehicle to enter. Entry passes are valid for seven days and you can pay by cash or card. If you’re visiting more than a couple of national parks across the US, you should invest in an annual pass for $US80.
- Many of Utah’s canyons were shaped by flash floods. If you’re hiking in a canyon, check the weather forecast before you go and ask a ranger for advice on if it’s safe to hike.
- If you want to do the Subway or Angel’s Landing hikes in Zion National Park, you’ll need to apply for a permit via a lottery system.
- The campgrounds in Zion National Park are popular and fill up quickly. If you’d like to camp in the park, book in advance for the Watchman Campground. Camping is also available outside the parks in commercial campgrounds.
- A shuttle bus operates in the summer months in Zion National Park. This means you’re not allowed to take your car to the east section of the park and have to take the shuttle in. The bus is free and you can catch it from the Visitor Centre and hop on and off as much as you like during your visit. There’s a lot of buses operating so you’ll never be waiting more than a few minutes.
- If hiking’s not your thing, you can still get good views of the Zion and Bryce Canyon national parks by driving through and taking in the view from various lookout points.